Introductions:
Yes, a happy weekend plus a holiday on Monday, so with choco and cookies placed on the table ah what a little time to spare ticking keyboards here. Anyway, we will be continuing our R.O.S tutorials , and its all about understanding how LIDARs works in R.O.S. We knew that the scattered lines served as the perception of a robot using this kind of sensors. These lines forming figures creates a dimensions of area used to be navigated by robots.The rays of line were formed as a collection of distances measured or sensed by LIDAR/LEDDAR).Thus infra red lights emitted by transmitter are then feedback to the receiver usually the photo diode. An array of these measured distances will be included in the parameters' value of scanning angle,time,and the number of points how wide is the coverage of scanning.All these parameters are wrapped in the "Sensor Messages/LaserScan" in a R.O.S string packet format.
This time, the deal is using rosserial library, "ros_lib and ROS Sensors Messages:: LaserScan. The Arduino DUE will process the publishing of "LaserScan" messages and its topic. Using "ros_lib" an Arduino Due communicate with the host R.O.S installed in the computer (Laptop/Desktop) both of which are connected physically via serial serial interface . In the near future of these tutorials, using Arduino/microcomputer will not be ideal anymore in integrating multiple sensors to R.O.S. This is because processing and computing will be at risk and not a practical design of R.O.S application. In short, the use of microcontroller is only to interface sensor modules yet most of single board computers have IO ports to their advantage.
Thus , what we will be doing is to get a common measuring modules such as SAMSUNG infrared or Ultrasonic SRF04 considered as poor man's LIDAR. SG90 servo motor will carry and rotate the sensor with the speed relative to the frequency of its data acquisition. The angle of rotation is as wide as 180 degrees angle, a back and forth or a clock and counter clockwise directions. It is possible to rotate 360 degrees wide but it requires a slip ring and that is an additional cost. The interval of time,angle, and number frequency of measuring distances can be set or adjusted depending the type of sensor or modules being used. To accurately dump data in R.O.S Laser scan messages , is to configure its parameter settings, for example a 180 degrees maximum angle if divided by desired 90 points then the angular interval of scanning is 2 degrees.
The simple steps to code ROS Laser Scanning,first is to initialize Sensor messages,its laser scan function ,and to check topic that publish messages. The finale, use the R.O.S visualization "rviz" to simulate the functionality of DIY LIDAR. Okay? So let's get this done :)
Requirements:
Software: Ubunto 16.04, ROS (kinetic)
Hardware: Arduino DUE, SBC or Laptop,SG90 Servo
Optional : sensors (ultrasonic or infra red)
Objectives:
1) To be able to publish a ranging(distance measurement sensor) messages from a DIY LIDAR to ROS .
2) To be able to study algorithm or program to collect array of measurements and feed(publish) it into a R.O.S messages format.
3) To create a program using rosserial library "ros_lib" from Arduino to ROS
Methodology:
Testing Arduino Due sample code to fake laser array of data(ranges)
Arduino Due code for Laser scan
Please copy and paste the program
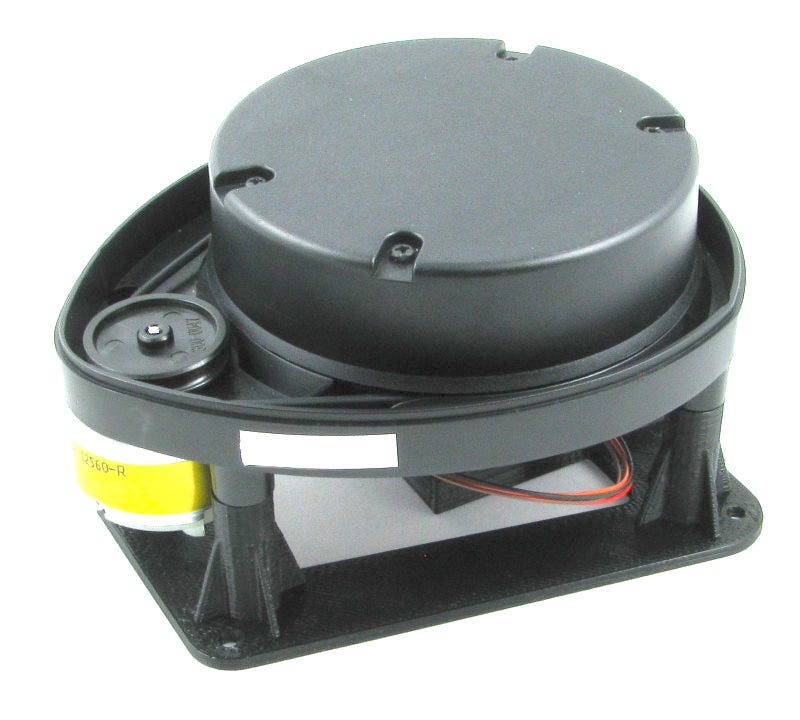
A simple setup of our DIY Lidar (photo credit to the photographer)
Open four CLI terminals:
Run the ros core "roscore"
robook# roscore
Communicate between ROS and Arduino using rosserial
library
robook # rosrun rosserial_python serial_node.py /dev/ttyUSB0
robook# rosrun rosserial_arduino serial_node.py _port:=/dev/ttyUSB0
Make sure that the "/laserScan" topic is being echoed or broadcasted to ROS.
robook# rostopic list
robook# rostopic echo /LaserScan
If Arduino DUE is able to bombard those collected ranges in ROS , scrolling
stream of string may appear in the screen
Set the transformation of the frame required to accurately map the laser data
robook# rosrun tf tf_publisher_transform 0.0 0.0 0.0 0.0 0.0 0.0 /base_frame /Lidar_frame
Displaying or visualizing the laser data, we can use RVIZ to plot
it in its grid map.
robook# rosrun rviz rviz
By setting the ROS Visualizer "rivz": fixed frame "Lidar_frame" and LaserScan
"LaserScan". The display would eventually appear same as the screen below.
Making sure that RVIZ is properly configured , LaserScan
topic is receiving messages coming from Arduino Due,also
transformation is set properly.
Summary:
Trouble: Arduino is not syncing to rosserial
Shooting: Place "#define USE_USBCON" before the include "ros.h"
Trouble: No display of laser data in RVIZ
Shooting : Check if there is a laser scan topic
Use #rostopic echo /LaserScan -> if this is the topic
Conclusion:
A simple code of a possible integrations of different ranging sensor to ROS